
Last Updated on February 7, 2026
If you’ve landed on this page, chances are you’re either embarking on your first job, starting a new business venture, or simply realizing the crucial importance of having a Tax Identification Number (TIN) in the Philippines. I’ve been there – navigating government processes can feel like walking through a maze, especially when it comes to something as fundamental as getting your TIN ID. But let me tell you, the game has changed! The Bureau of Internal Revenue (BIR) has significantly streamlined the BIR TIN ID online application process, making it much more accessible and less daunting than it used to be.
For years, getting a TIN involved physically visiting a Revenue District Office (RDO), enduring long lines, and filling out multiple forms. While some physical processes still exist, the digital transformation, especially through the BIR’s Online Registration and Update System (ORUS), has revolutionized how we, as Filipinos, can secure this vital identification. As someone who has personally gone through the journey of both initial TIN acquisition and then upgrading to the digital TIN ID, I’m here to share my firsthand experience, tips, and the exact steps to help you confidently navigate the BIR TIN ID online application process in 2025.
A TIN is more than just a number; it’s your unique identifier for all tax-related transactions, a key requirement for employment, opening bank accounts, applying for loans, and even starting a business. My goal with this guide is to break down the complexities, offer practical solutions to common hurdles, and empower you to get your TIN and digital TIN ID without the usual stress. Let’s demystify the process together and secure your financial future!
Key Takeaways:
- The BIR TIN ID is a crucial identification for tax purposes, employment, and various financial transactions in the Philippines.
- The primary method for acquiring a TIN and its corresponding digital ID is now largely online through the BIR’s ORUS system.
- Eligibility for TIN application varies based on your income source (employed, self-employed, or one-time taxpayer).
- Preparation of necessary documents and accurate information is vital for a smooth online application.
- Understanding your correct Revenue District Office (RDO) is important, as it determines where your tax records are managed.
Why a BIR TIN ID is Non-Negotiable in the Philippines
Before we dive into the nitty-gritty of the BIR TIN ID online application process, let’s truly appreciate why having a Tax Identification Number is absolutely essential in the Philippines. From my own experience, it quickly became apparent that life in the formal economy is almost impossible without one. It’s not just a government formality; it’s a gateway to various opportunities and a fundamental aspect of civic responsibility.
Your Unique Taxpayer Identity
At its core, your TIN is a unique, nine-digit identification number issued by the Bureau of Internal Revenue to every taxpayer in the Philippines. Think of it as your financial fingerprint for the government. It allows the BIR to track your income, tax declarations, and payments, ensuring that you fulfill your obligations as a responsible citizen. Without a TIN, you practically don’t exist in the national tax system.
Gateway to Employment
For many Filipinos, the first encounter with the need for a TIN is when they secure their first job. Employers, by law, require new hires to provide a TIN for payroll purposes, withholding taxes, and remittance to the BIR. Without it, your employment process can be significantly delayed, or you might not even be able to start. I remember the rush to get mine ready before my first official day at work; it was a non-negotiable part of the onboarding checklist.
Essential for Financial Transactions
Beyond employment, your TIN ID is a widely accepted form of identification across various financial institutions. Planning to open a new savings account? The bank will ask for your TIN. Applying for a credit card, a housing loan, a car loan, or any form of credit? Your TIN will be a mandatory requirement. Even for basic transactions like investing in mutual funds or bonds, your TIN is key to proper identification and reporting.
Starting a Business or Professional Practice
If you’re an aspiring entrepreneur or a professional looking to go freelance, getting your TIN is one of the very first steps in formalizing your business or practice. Whether you’re registering a sole proprietorship, partnership, or corporation, the BIR requires a TIN for the business entity and its owners/partners. This is crucial for obtaining business permits, issuing official receipts, and filing your business taxes.
Other Government Transactions
The utility of a TIN extends to a wide array of other government services. Need to get a Passport? While not always the primary ID, having your TIN can sometimes streamline processes. Applying for specific licenses or permits? Often, a TIN is part of the required documentation. Even for one-time transactions like selling a property or vehicle, a TIN is necessary for tax clearance. It genuinely simplifies interactions with various government agencies.
A Step Towards Financial Responsibility and Compliance
Ultimately, possessing a TIN and understanding its purpose is a significant step towards financial responsibility. It enables you to actively participate in the nation’s tax system, contributing to public services and infrastructure. It signifies that you are a compliant taxpayer, which can open doors to more opportunities and avoid future complications with the BIR.
Understanding the Different TIN Application Scenarios
Before diving into the online process, it’s crucial to understand that the BIR has different categories for TIN applications. This significantly impacts which forms you might need and the general procedure. From my experience, knowing your category upfront saves a lot of confusion.
1. Employed Individuals (EO 98 / Purely Compensation Income Earners)
This is the most common scenario for first-time TIN applicants. If you are a new employee earning purely compensation income, your employer is generally responsible for facilitating your TIN application. While the employer registers you, you will still interact with the online system to finalize the process and get your digital ID.
- BIR Form: Typically BIR Form 1902 (Application for Registration for Individuals Earning Purely Compensation Income, Local and Alien Employee). Your HR usually handles the submission of this form on your behalf.
- Key Point: Do NOT apply for a TIN yourself if your employer is already processing it for you, as having multiple TINs is illegal and carries penalties. Verify with your HR first.
2. Self-Employed Individuals / Professionals / Mixed Income Earners
If you are a freelancer, a small business owner (sole proprietorship), or a professional practicing independently (e.g., doctor, lawyer, accountant), you fall under this category. You are directly responsible for registering your TIN and your business with the BIR.
- BIR Form: BIR Form 1901 (Application for Registration for Self-Employed and Mixed Income Individuals, Estates, and Trusts).
- Key Point: This process is more extensive as it involves registering your business activity, books of accounts, and potentially paying annual registration fees.
3. One-Time Taxpayers (ONETT)
This category applies to individuals who need a TIN for a single transaction, such as the sale of real property, transfer of shares, or donation, and who do not have an existing TIN. They are not employed or self-employed for continuous income.
- BIR Form: BIR Form 1904 (Application for Registration for One-Time Taxpayer and Persons Registering Under E.O. 98, Other Than Those under Purely Compensation Income).
- Key Point: This is for one-time transactions and does not establish an ongoing tax obligation like employment or business.
4. Overseas Filipino Workers (OFWs) / Non-Resident Citizens
OFWs and non-resident citizens who are not engaged in business in the Philippines but need a TIN for specific transactions (e.g., investments, property acquisition) can also apply.
- BIR Form: Often falls under EO 98, similar to employed individuals, or for ONETT if applicable. The ORUS system now accommodates OFWs for TIN application and digital TIN ID generation.
- Key Point: OFWs not deriving income from sources within the Philippines are generally exempt from income tax in the Philippines, but may still need a TIN for other transactions.
For the purpose of this guide on the BIR TIN ID online application process, we will primarily focus on the most common scenario: a new applicant, typically an employed individual, getting their TIN for the first time, and then proceeding to get their Digital TIN ID. While the initial TIN acquisition for self-employed individuals also uses ORUS, the subsequent steps involving business registration are more complex and would require a separate, dedicated guide.
What You Need: Preparing Your Documents and Information for Online TIN ID Application
Just like any official government transaction, preparation is crucial. Having all your necessary documents and information ready before you start the BIR TIN ID online application process will save you a lot of time and potential headaches. Based on my personal experience, a checklist is your best friend here.
Essential Requirements for New TIN Applicants (e.g., Employed Individuals):
- Valid Government-Issued ID: This is critical for identity verification. It must clearly show your full name, birthdate, and address. If your ID doesn’t have your address, you might need a separate proof of residence (e.g., utility bill).
- PhilID (National ID) / ePhilID
- Philippine Passport
- Driver’s License
- UMID (SSS/GSIS ID)
- Professional Regulation Commission (PRC) License
- Voter’s ID
- Postal ID (Digitized)
- OWWA ID
Pro-Tip: Ensure your chosen ID is clear, untampered, and contains consistent information with your application details. You’ll likely need to take a clear photo of this ID and a selfie holding it later in the process.
- Active Email Address: This is your primary communication channel with the BIR for ORUS. All confirmations, notifications, and your login credentials will be sent here. Make sure it’s an email you regularly check and have full access to.
- Active Philippine Mobile Number: For further verification and important updates.
- Personal Information: Have these details readily available and ensure they match your government ID:
- Complete Name (First Name, Middle Name, Last Name, Suffix if any)
- Date of Birth
- Place of Birth
- Civil Status (if married, have your spouse’s TIN and name ready if applicable for Form 1902)
- Mother’s Maiden Name (Full Name)
- Current Address (House/Lot No., Street, Subdivision/Village, Barangay, City/Municipality, Province, Zip Code)
- Employment Information (if applicable):
- Employer’s Name
- Employer’s Address
- Date of Employment
- RDO of your employer (your employer’s HR can provide this).
- Marriage Certificate (for married female applicants): A scanned copy of your PSA-issued Marriage Certificate is often required, especially for Form 1902 if you’re taking your husband’s surname for tax purposes or if your current ID doesn’t reflect your married status.
- Stable Internet Connection: Essential for a smooth online process.
- Device for Photo Capture: A smartphone or computer with a webcam to take the required selfie with your ID.
Important Notes on Documents:
- Scanned Copies: While ORUS primarily asks for uploads during the digital TIN ID generation phase, it’s good practice to have clear, scanned copies (PDF or JPEG) of your government ID and marriage certificate (if applicable) ready, just in case.
- File Size: Be mindful of file size limits if you need to upload documents. Typically, individual files should not exceed a few MBs.
Having this checklist prepared before you even open the ORUS website will significantly reduce the time and effort required for your BIR TIN ID online application process. Trust me, I learned this the hard way during my first attempt when I had to scramble for documents in the middle of the application!
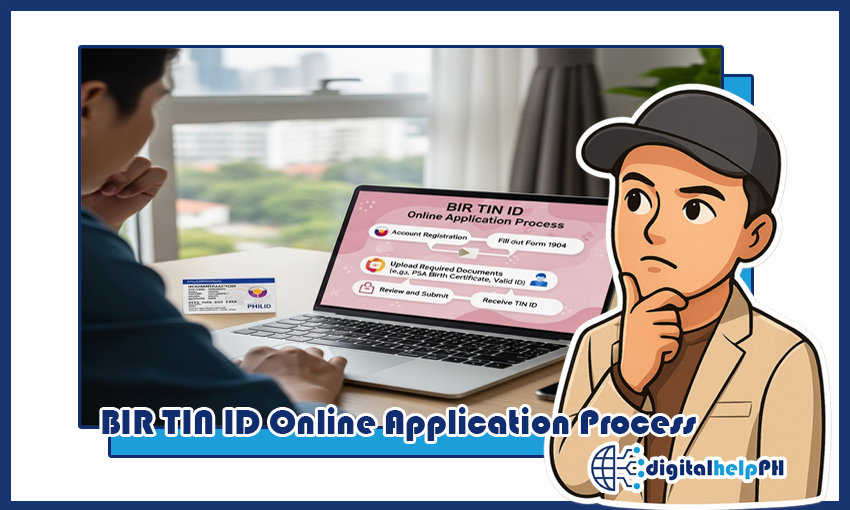
The Step-by-Step Guide: Navigating the BIR TIN ID Online Application Process via ORUS
Alright, let’s get down to business! The BIR has introduced the Online Registration and Update System (ORUS) as the primary platform for individuals to apply for a new TIN and, crucially, to generate their digital TIN ID. From my personal experience, following these steps meticulously is key to a hassle-free application.
Part 1: Obtaining Your TIN (For First-Time Applicants, Especially Employed)
This section primarily applies to individuals who *do not* have an existing TIN and are getting one for the first time, often facilitated by an employer. If you already have a TIN but need the digital ID, skip to Part 2.
Step 1: Employer Initiates TIN Application (Most Common Scenario for Employees)
In most cases for new employees, your Human Resources (HR) department will be the one to initiate your TIN application. They will ask you for your personal details and usually submit BIR Form 1902 on your behalf through their employer-side access on ORUS.
- Your Action: Provide your HR with all necessary documents and information (Government ID, Marriage Certificate if applicable, personal details).
- BIR Process: Your employer uses the ORUS Employer Service Link to register you. The system checks for existing TINs. If none are found, your TIN is often automatically approved. If there are potential duplicates, it’s flagged for RDO review.
Once your employer has initiated the process, you should receive an email notification from BIR ORUS with a link to create your own individual ORUS account or to confirm your registration. Crucially, your TIN will often be generated and viewable within this ORUS account once approved.
Step 2: Creating Your ORUS Account (If Not Yet Created)
Whether your employer initiated it or you need to start from scratch (e.g., some self-employed individuals might directly use ORUS for TIN), creating your ORUS account is the gateway to the digital TIN ID.
- Go to the ORUS Portal: Open your web browser and navigate to the official BIR ORUS website: orus.bir.gov.ph.
- Click “New Registration”: On the ORUS homepage, select “New Registration.”
- Choose “As an Individual”: Select this option.
- Create an Account: Look for the “Create an Account” button.
- Select “Taxpayer” and “Without Existing TIN” (if applicable): If you truly don’t have a TIN yet, select “Without Existing TIN.” A reminder about the illegality of multiple TINs will pop up; click “I Agree.”
- User Type-Transaction: For new employees, choose “Get TIN for Filipino Citizen-E.O. 98/One Time Taxpayer.” For self-employed, the process differs slightly and usually involves business registration first.
- Fill Out the Form: Enter your personal details: Last Name, First Name, Middle Name, Suffix, Birthdate, Gender, Civil Status, Mother’s Maiden Name, Active Email Address, and Mobile Number.
- Set Password: Create a strong password for your ORUS account.
- Register: Click the “Register” button. You will receive an email verification link.
- Verify Email: Check your email inbox (and spam folder!) for the verification link from BIR ORUS. Click the link to activate your account. This email address will be your ORUS login ID.
Step 3: Completing the TIN Application Form on ORUS (If Self-Initiating)
If you’re directly applying for a TIN as a self-employed individual or for a one-time transaction via ORUS, you’ll proceed to fill out the digital equivalent of BIR Form 1901 or 1904 within the system.
- Log in to ORUS: Use your newly created account (email and password).
- Navigate to “New Registration”: Again, select “As an Individual” and then “Fill Up Registration Form.”
- Complete the Multi-Page Form: This form will prompt you for comprehensive personal, family, and income/employment details across several pages. Be meticulous.
- Taxpayer Classification: Select the appropriate classification (e.g., “Purely Compensation Income Earner,” “Self-Employed,” “Professional,” “Mixed Income Earner,” “One-Time Taxpayer”).
- Residence/Business Address: Provide accurate and complete address details.
- Source of Income: Specify your source of livelihood.
- RDO: The system will likely suggest your RDO based on your address. Confirm this.
- Upload Documents: Towards the end of the form, you’ll be prompted to upload:
- A clear scan/photo of your chosen government-issued ID.
- A selfie of you holding the same government-issued ID (ensure your face and the ID details are clearly visible).
- Scanned copy of your Marriage Certificate (if applicable).
- Review and Submit: Carefully review all information entered across all pages. Any discrepancies can lead to rejection. Once satisfied, click “Submit Application.”
You will receive an email acknowledging receipt of your application. The BIR will then process it. If automatically approved (common for purely compensation income if no duplicates), your TIN will be generated. If flagged for RDO review (e.g., potential duplicates, self-employed applications), it might take a few days for manual processing. You’ll be notified via email of the status.
Part 2: Getting Your Digital TIN ID (For Existing TIN Holders or Newly Acquired TIN)
Once you have a TIN (whether it was automatically generated via employer, you applied directly, or you’ve had it for years), you can proceed to get your digital TIN ID, which is now the preferred and most convenient way to obtain your TIN ID card.
Step 1: Ensure You Have an Active ORUS Account (and it’s linked to your TIN)
If you already have a TIN but haven’t used ORUS yet, you’ll need to create an account and ensure it links to your existing TIN. This is crucial.
- Go to ORUS Portal: orus.bir.gov.ph.
- Click “New Registration” then “As an Individual.”
- Select “Create an Account.”
- Choose “Taxpayer” and this time, select “With Existing TIN.”
- Fill Out the Form: Enter your existing TIN, Last Name, First Name, Middle Name, Birthdate, and an Active Email Address. Important: The email address you provide *must* be the one associated with your RDO records, or it needs to be updated. If your email isn’t updated with BIR, you might need to do that first via the Taxpayer Registration-Related Application (TRRA) portal or by directly contacting your RDO.
- Register and Verify Email: Follow the prompts to register and verify your email address.
Step 2: Log in to Your ORUS Account and Access Digital TIN ID
- Log In: Go to orus.bir.gov.ph and log in using your registered email and password.
- Locate “Get Your Digital TIN ID”: Once logged in, on the left-hand menu (or dashboard), you should see an option like “Get Your Digital TIN ID” or “Digital TIN ID.” Click on it.
- Select “View Your Digital TIN ID”: Follow the on-screen instructions. You’ll likely see a button that says “View Your Digital TIN ID.” Click it.
- Review Draft ID: A draft version of your digital TIN ID will appear, showing your name, TIN, RDO number, QR code, and issue date. Review all details carefully. This is important because any discrepancies might require an update through your RDO.
Step 3: Upload Your Photo
This is where your preparedness with a good quality photo comes in. The BIR has specific guidelines for the photo you upload for your digital TIN ID:
- Size: 1×1 inch size, but the system will likely crop it correctly if you upload a standard headshot.
- Background: Plain white background, no borders.
- Recency: Photo should be taken within the last six months.
- Facial Expression: Neutral expression or a slight smile (no teeth), eyes looking straight at the camera.
- Visibility: Both ears should be visible (unless for religious/medical reasons). No head tilting.
- Obstructions: Nothing should cover your face (e.g., sunglasses, large accessories, headphones).
- Clarity: High-resolution, clear, and well-lit. Avoid blurry or pixelated images.
Warning: The system will reject inappropriate images (e.g., cartoons, animals). Ensure your photo adheres strictly to these guidelines to avoid delays.
Click “Upload Photo” and select the image file from your device. Adjust the crop if necessary.
Step 4: Generate and Download Your Digital TIN ID
- Confirm: After uploading your photo, a confirmation message with terms and conditions will pop up. Read them, then click “Confirm” to proceed with generating your digital TIN ID.
- Survey (Optional): You might be asked to complete a short survey.
- Download: Once generated, you can click the “Download Digital TIN ID” button. Your digital TIN ID will be downloaded as a PDF file.
Save this PDF file to your device and print a copy if you need a physical representation. The digital TIN ID bears a unique QR code that can be scanned and verified using the BIR’s TIN Verifier App, ensuring its authenticity.
Important Reminders for the Online Application:
- One TIN Per Person: It cannot be stressed enough – an individual is only allowed one TIN. Applying for a second TIN is illegal and can lead to penalties. If you suspect you already have one, use the TIN inquiry services first (see Troubleshooting section).
- RDO Jurisdiction: Your TIN is linked to a specific Revenue District Office (RDO) based on your registered address or your employer’s RDO. This RDO is where your tax records are managed. While the digital process is convenient, some updates or complex issues still require coordination with your RDO.
- Processing Time: While the digital TIN ID can be generated in minutes once your ORUS account is set up and linked, the initial TIN issuance (especially for self-employed or if there are duplicate checks) can still take a few days.
Navigating Common Hurdles: Troubleshooting the BIR TIN ID Online Application Process
Even with the most streamlined systems, encountering issues during an online application is always a possibility. Based on my own digital journeys with government services, here are some common problems you might face during the BIR TIN ID online application process and how to tackle them.
1. “TIN Not Found” / “Invalid Information” During ORUS Account Creation (Existing TIN Holders)
This usually happens when your personal details in ORUS (especially your email address) don’t match the BIR’s existing records for your TIN.
- Solution A: Update Your Email Address: The most common culprit. The BIR requires that the email you use for ORUS be the one registered with them. If it’s not, you need to update it.
- Via TRRA Portal: Go to the BIR Taxpayer Registration-Related Application (TRRA) Portal. Select “Updating of Email Address using Application Sheet Form S1905.” Fill out the form, attach required documents (like a valid ID), and email it to your RDO’s official email address. You can find your RDO’s email through the TRRA portal’s “Where to Submit” section. It usually takes 3 working days for the RDO to process this.
- Via RDO (Manual): If the TRRA portal doesn’t work for you, you might need to physically visit your RDO to submit BIR Form 1905 for updating your email address.
- Solution B: Verify Your TIN Details: Double-check your TIN, name, and birthdate for typos. If still an issue, you might need to verify your details with the BIR.
2. “You Already Have an Existing TIN” Error (New Applicants)
This means you (or an employer) might have already registered a TIN for you in the past. It’s illegal to have multiple TINs.
- Solution A: TIN Verification:
- Through ORUS (TIN Inquiry): Log in to ORUS (if you have an account, or try creating one with “With Existing TIN”). Look for a “TIN Inquiry” or “TIN Validation” option.
- Through BIR Chatbot “Revie”: Visit the main BIR website (www.bir.gov.ph). Look for the chatbot icon (usually at the bottom right, named “Revie”). You can ask Revie to perform a “TIN Validation” or “TIN Inquiry.” You’ll need to provide your name, birthdate, and mother’s maiden name.
- Email to BIR: Send an email to tin.inquiry@bir.gov.ph with your complete name, birthdate, and mother’s maiden name. They usually respond within 2-3 business days.
- Visit Your RDO: As a last resort, or if online methods fail, visit the nearest BIR RDO. Bring a valid ID.
- Solution B: Coordinate with Employer: If you’re a new employee, your HR should also be able to verify if a TIN has already been assigned to you.
3. Photo Upload Issues (Digital TIN ID Generation)
Your uploaded photo might be rejected if it doesn’t meet the BIR’s strict specifications.
- Solution: Review Photo Guidelines Carefully: Re-read the photo requirements (1×1, white background, neutral expression, no obstructions, clear, recent). Use a photo editing tool if needed to adjust dimensions or background. Ensure sufficient lighting. Try taking a new photo if the current one is problematic.
4. ORUS Website Glitches or Slow Performance
Like any online portal, ORUS can experience technical issues, maintenance, or heavy traffic, especially during peak tax seasons.
- Solution A: Try Again Later: Often, patience is key. Try accessing the portal during off-peak hours (early morning, late night, or weekends).
- Solution B: Clear Cache and Cookies: Clear your browser’s cache and cookies, or try using a different web browser (e.g., Chrome, Firefox, Edge).
- Solution C: Check Internet Connection: Ensure your internet connection is stable and fast enough.
5. Delayed Email Notifications
Confirmation emails, verification links, or TIN notifications might be delayed or go missing.
- Solution A: Check Spam/Junk Folder: Always check these folders first.
- Solution B: Double-Check Email Address: Ensure the email address you provided in the application is correct.
- Solution C: Wait: Allow up to 24 hours for automated emails to arrive.
- Solution D: Contact BIR: If an email is critical (e.g., verification link for account activation) and hasn’t arrived after a reasonable time, contact BIR customer service or your RDO.
6. Difficulty Determining Your Correct RDO
Your RDO is crucial as it’s your designated tax office. While ORUS often auto-determines, it’s good to confirm.
- Solution A: BIR RDO Finder: Use the RDO Finder tool on the BIR website (https://revie.bir.gov.ph/rdo-finder). You’ll typically input your TIN (if you have one), or your name and birthdate, and it will show your RDO.
- Solution B: Chatbot Revie: The BIR Chatbot “Revie” can also assist with “RDO Finder” queries.
- Solution C: Employer’s HR: If employed, your HR department can tell you which RDO they registered you under.
- Solution D: Call BIR Customer Service: The BIR Customer Assistance Division can help you identify your RDO.
Don’t get discouraged if you hit a snag. The key is to systematically troubleshoot. Most online issues can be resolved with patience and by utilizing the BIR’s official verification channels or, if necessary, reaching out to their customer service or your designated RDO.
FAQs About the BIR TIN and Digital TIN ID
To further assist you, I’ve compiled answers to some of the most frequently asked questions about the BIR TIN and the BIR TIN ID online application process. These are common concerns that often arise, and having quick answers can make your journey much smoother.
Can I apply for a TIN ID online if I don’t have a job yet?
Generally, no. A TIN is typically issued when you become employed (purely compensation income earner), start a business (self-employed/professional), or engage in a one-time taxable transaction (ONETT). The BIR’s system is designed to issue a TIN based on these specific taxpayer types. If you’re unemployed, you typically only get a TIN if you fall under the ONETT category (e.g., selling a property and need to pay capital gains tax).
Is the Digital TIN ID free?
Yes, the generation of the Digital TIN ID through the ORUS system is absolutely free. You should not pay anyone to get your Digital TIN ID. The physical TIN card issued at RDOs upon initial registration is also free.
Do I still need a physical TIN ID card after getting the digital one?
The BIR, through Revenue Memorandum Circular (RMC) No. 120-2023, has strongly advised taxpayers to secure their Digital TIN ID online via ORUS and clarified its full validity and acceptance for all government and private transactions. While some RDOs might still issue physical cards for initial applicants, the digital TIN ID is the primary and official version. It’s instantly verifiable via a QR code using the BIR’s TIN Verifier App, making it highly secure and convenient.
How long does it take to get my TIN and Digital TIN ID?
If your TIN application is straightforward (e.g., employer-initiated for a purely compensation income earner with no duplicate records), your TIN can be generated almost immediately. Once you have a TIN and an active ORUS account, the Digital TIN ID can be generated in minutes. If your application requires RDO review (e.g., self-employed registration, duplicate TIN checks, or email updates), it can take 3-5 business days or more.
What happens if I have two TINs?
Having multiple TINs is strictly prohibited by law and is considered a criminal offense under the National Internal Revenue Code (NIRC). It can lead to penalties, fines, and serious legal complications. If you discover you have two TINs, immediately contact your RDO to rectify the situation and deactivate the duplicate TIN. Do not attempt to use both.
Can I update my information (e.g., address, civil status) using ORUS?
ORUS primarily supports initial registration and Digital TIN ID generation. For significant updates like change of address, civil status, or RDO transfer, you usually need to file BIR Form 1905 with your Revenue District Office (RDO). Some minor updates, like email address, can be done via the TRRA portal or by direct communication with your RDO.
How can employers verify a new hire’s TIN?
Employers can verify a new hire’s TIN through the BIR’s online services, including ORUS (if they have an employer account) or by using the TIN Verifier App to scan the Digital TIN ID’s QR code. They can also send a list of new hires to their RDO for verification.
Is the Digital TIN ID accepted by banks and other institutions?
Yes, based on BIR RMC No. 120-2023, the Digital TIN ID is considered a valid and sufficient proof of TIN for all government and private transactions. Banks, government agencies, and other institutions are mandated to accept it.
What is my RDO and why is it important?
Your Revenue District Office (RDO) is the BIR office that has jurisdiction over your tax records. It’s usually determined by your registered residence address or, for employees, your employer’s RDO. It’s where you would traditionally file manual returns, address compliance issues, and get assistance. While many services are now online, your RDO remains the administrative hub for your tax profile. You can find your RDO using the BIR’s RDO Finder online tool.
Can OFWs apply for TIN and Digital TIN ID online?
Yes, OFWs who are active Pag-IBIG Fund members or need a TIN for a one-time transaction (e.g., property sale in the Philippines) can apply for a TIN and generate their Digital TIN ID online through the ORUS portal. The process is similar to local individuals, focusing on the “Filipino Citizen – E.O. 98” category.
Final Thoughts: Empowering Yourself Through the Digital BIR TIN ID Application
My journey through understanding and utilizing the BIR TIN ID online application process has truly been an eye-opener. What once seemed like a daunting task, fraught with physical queues and confusing forms, has been transformed by the BIR’s digital initiatives like ORUS. The shift towards online convenience is a significant leap forward for Filipino taxpayers, enabling us to manage our essential government transactions with greater ease and efficiency.
Securing your Tax Identification Number and its corresponding Digital TIN ID is more than just fulfilling a government requirement; it’s about establishing your identity within the Philippine financial and legal framework. It’s a vital step for employment, for financial independence, and for being a responsible and compliant citizen. The digital TIN ID, with its QR code verification, offers a layer of authenticity and convenience that traditional physical cards often lacked.
By following this comprehensive, step-by-step guide, you are now equipped with the knowledge and confidence to navigate the BIR TIN ID online application process yourself. Remember to always double-check your information, prepare your documents beforehand, and don’t hesitate to use the BIR’s official online verification tools or contact their customer service if you encounter any issues.
Your financial future in the Philippines starts with a solid foundation, and your TIN is undeniably a cornerstone of that foundation. Take this crucial step today and empower yourself with this essential government identification. For more guides on digital banks, e-wallets, online government services, and mobile banking, continue to explore digitalhelpph.com – your trusted resource for navigating the digital landscape in the Philippines!